How a window manager with tiling layouts makes a 1024x600 resolution livable.
I spend a lot of time in front of a screen, and for the past year I have used only my netbook. No desktops, no laptops. Just a cheap $200 computer that is nearly a kid's toy. The most challenging thing about this is dealing with the 1024x600 screen resolution. When I moved to this screen from something with many more pixels, it at first seemed very cramped.
After a year, I think that the most important part of coping with the small screen is the flexability and customizability of layouts provided by the Xmonad window manager. In this post I will explain a few layouts I have developed for fitting specific tasks onto the netbook screen.
(I assume that you know maybe 0.1% of Haskell (about what I do), and can read Haskell code without having a brain aneurysm.)
web browsing
It's important that the web browser have as few toolbars and other cruft as possible, as horizontal space is especially at a premium. I've configured both Epiphany and Firefox to put everything in one tool bar. But now I use Chromium, which comes pre-configured that way.
What the netbook is designed for. You just want a web browser, taking up
the full screen, and with its own tabs. So far, so easy: that's Xmonad's
Full layout.
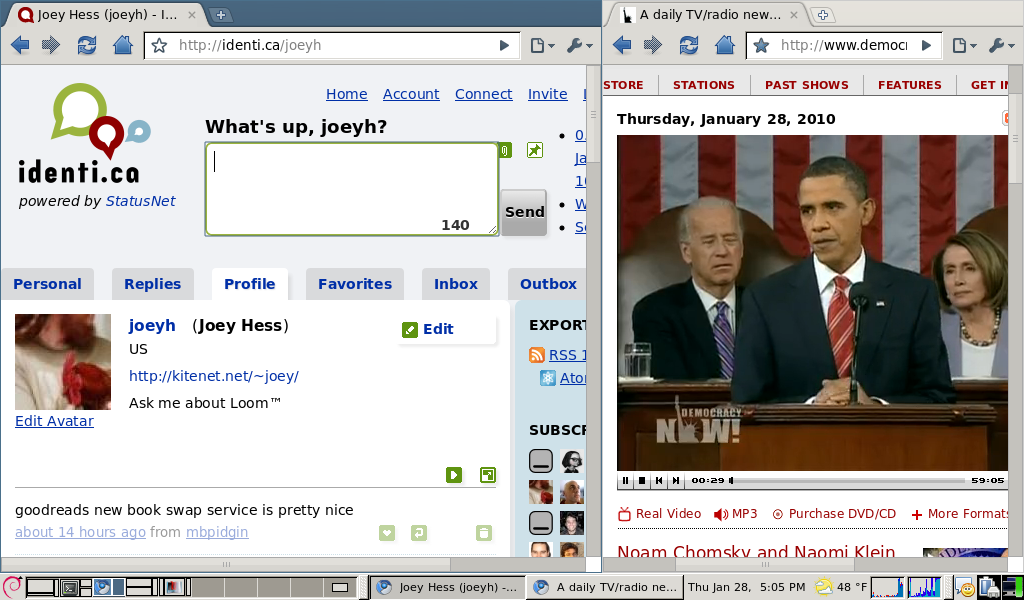
But, you sometimes want to see two websites side-by-side. This layout
accomplishes that, allowing the sizes to be adjusted as needed. It also
uses Xmonad's Magnifier to zoom the smaller window when it's focused,
which is useful if you briefly need to see more of a web site.
mySplit = magnifiercz' 1.4 $ Tall nmaster delta ratio
    where
        -- The default number of windows in the master pane
        nmaster = 1
        -- Percent of screen to increment by when resizing panes
        delta   = 3/100
        -- Default proportion of screen occupied by master pane
        ratio   = 60/100
web development
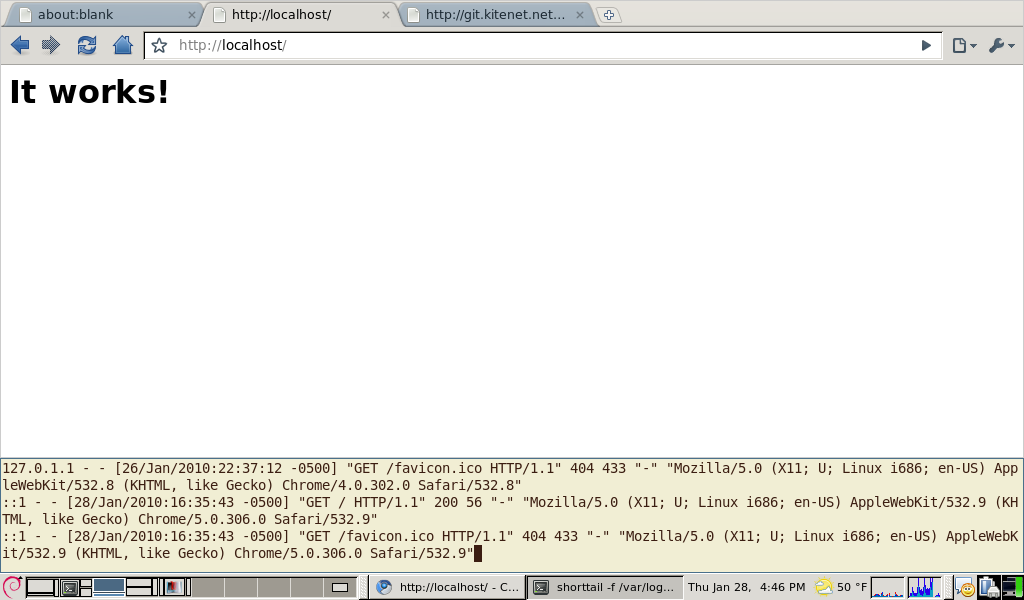
If you're doing web development, you'll want probably one big web browser
window, but also with a nice wide terminal on the same screen, in order to
see web server logs. A simple way to do this is to mirror Xmonad's Tall
layout by 90 degrees.
myWide = Mirror $ Tall nmaster delta ratio
    where
        -- The default number of windows in the master pane
        nmaster = 1
        -- Percent of screen to increment by when resizing panes
        delta   = 3/100
        -- Default proportion of screen occupied by master pane
        ratio   = 80/100
The myWide layout uses the full screen width for a single terminal,
and splits the width when there are more. This is sufficient for viewing logs
and doing minor things at the shell prompt, in between testing the result in
the web browser. Of course a terminal can be temporarily moved to the master
area by pressing mod-return, if you need it to be larger.

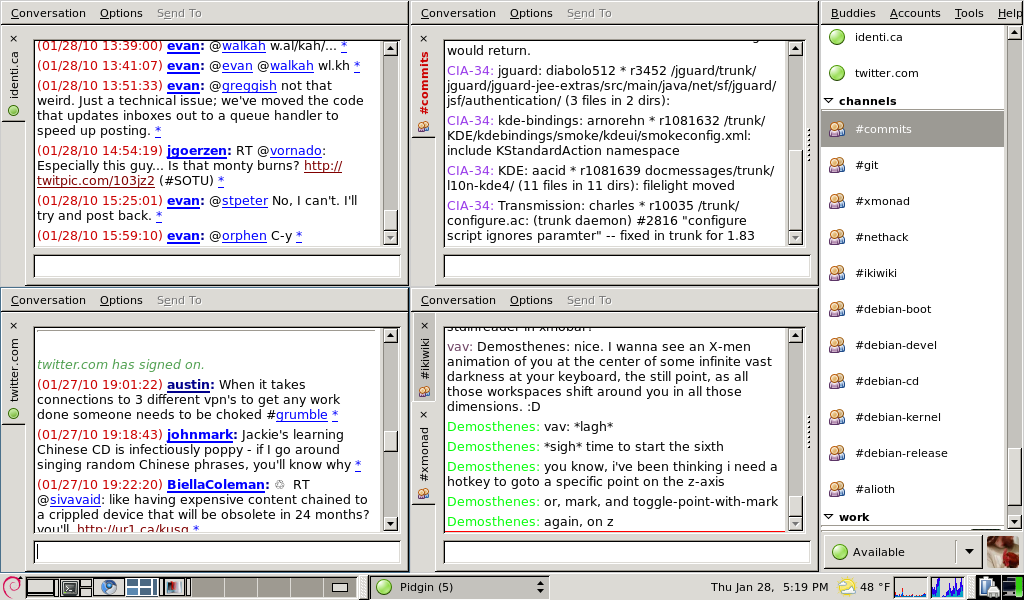
chat
Tips on configuring Pidgin for a netbook: Set it up to use vertical tabs to save horizontal space. Configure the input area to only 1 line tall, and turn off as much other cruft as you can. The menu bars, sadly, cannot be disabled, nor can the excessively large borders. In my screenshots, you can see that stuff wasting space that could be used to show four more lines of text.
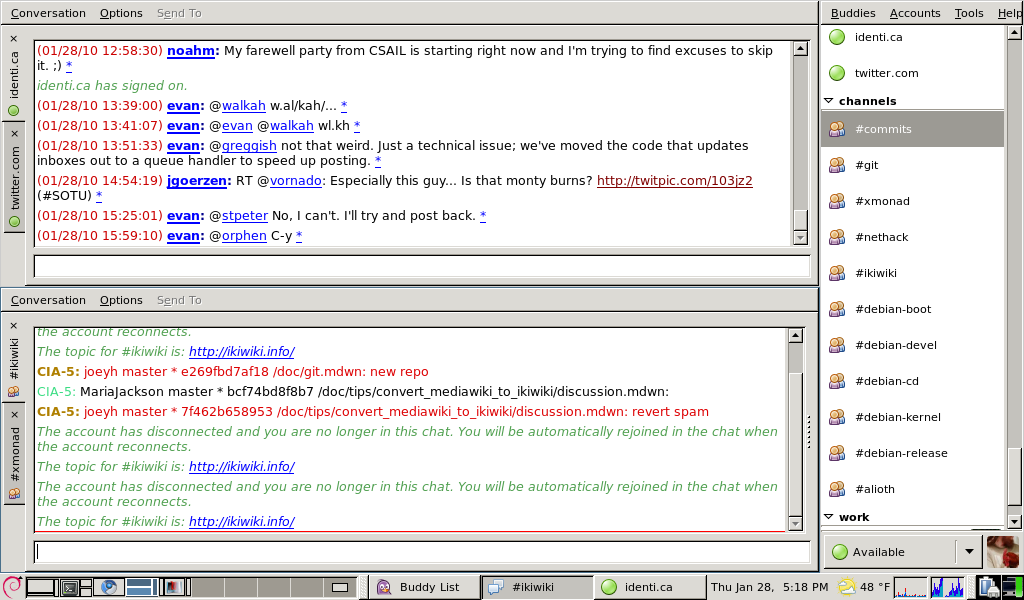
For chat, you want to put the buddy list on the side of the
screen, and use the rest for conversation windows. Xmonad's IM module
takes care of allocating a sidebar on the screen for the buddy window. The
rest of the screen can be occupied by any layout you choose.
I like to have the conversation windows be as wide as possible, and
typically only want to see two conversations at a time. But sometimes I
might have a dozen visible. A good layout to cope with those needs is
Grid.
myChat' l = withIM size roster l
    where
        -- Ratio of screen roster will occupy
        size = 1%5
        -- Match roster window
        roster = Title "Buddy List"
myChat = myChat' Grid
The withIM layout puts the buddy list on the left; I prefer it on the right
for some reason, so I tweaked my layout to do that. All it took was
using the reflectHoriz layout modifier to get a mirror image of
the layout. Then I reflect the inner layout back to its normal orientation.
Being able to throw in a few function calls and mutate a layout like that
is where Xmonad shines.
myChat' l = reflectHoriz $ withIM size roster $
            reflectHoriz $ l
logs
Ever notice that tail -f wastes the last line of the terminal? On a netbook
this matters.
shorttail
lets the last line be used.
I have a dedidated workspace that I use to tail logs, and as a place to
send long-running tasks (such as compiles). The layout for this needs to
keep windows wide, to see whole logged lines, but they need only be five
or so lines tall. And it's convenient to have one bigger window with the
small ones below. Xmonad has a perfect layout for this, called Dishes,
because it's sorta like a stack of plates.
myDish = limitWindows 5 $ Dishes nmaster ratio
    where
        -- The default number of windows in the master pane
        nmaster = 1
        -- Default proportion of screen occupied by other panes
        ratio = 1/5
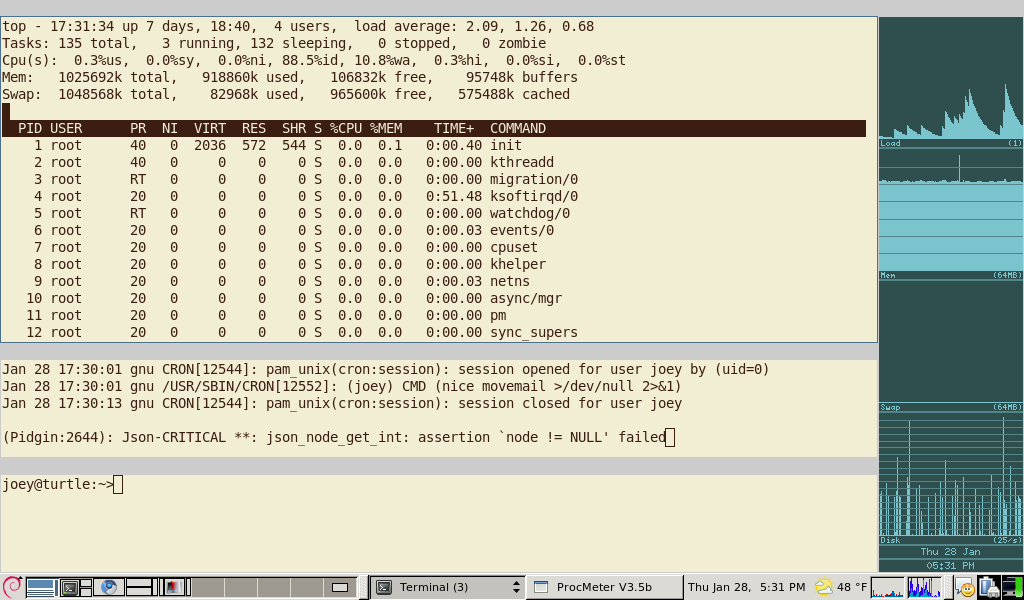
In the second screenshot above, I have 6 windows open, but only 5 are
visible. The limitWindows 5 accomplishes this. It's handy mostly because
gnome-terminal has a bad habit of crashing when resized to 0x0.
(That's gotta be a bug in something!)
Notice that the screenshots above also have Procmeter in a sidebar on
the right. I (ab)used the withIM layout to do that:
myLogs' l = reflectHoriz $ withIM procmeterSize procmeter $
              reflectHoriz $ l
    where
        -- Ratio of screen procmeter will occupy
        procmeterSize = 1%7
        -- Match procmeter
        procmeter = ClassName "ProcMeter3"
myLogs = myLogs' myDish
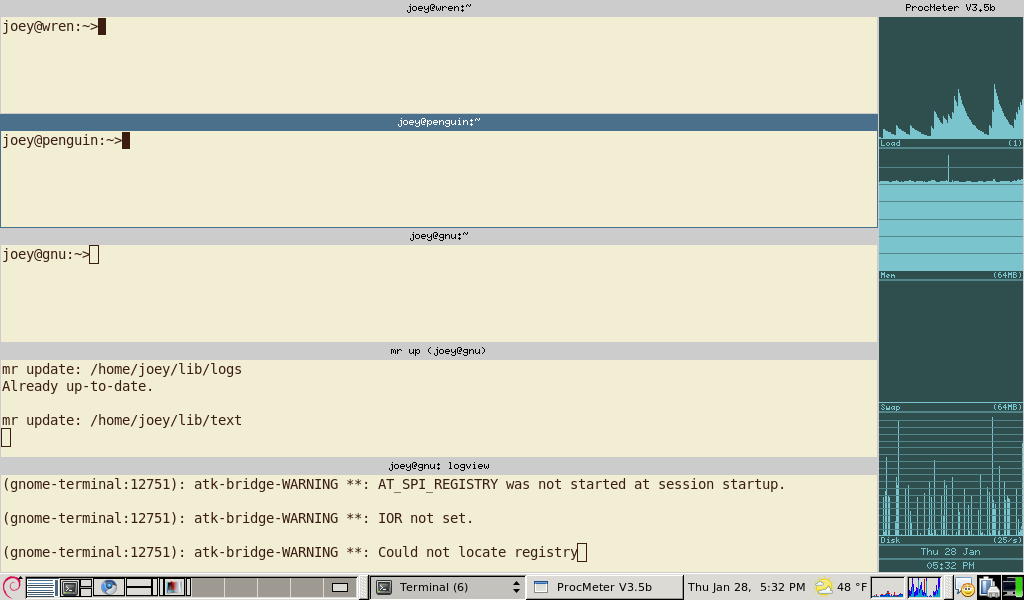
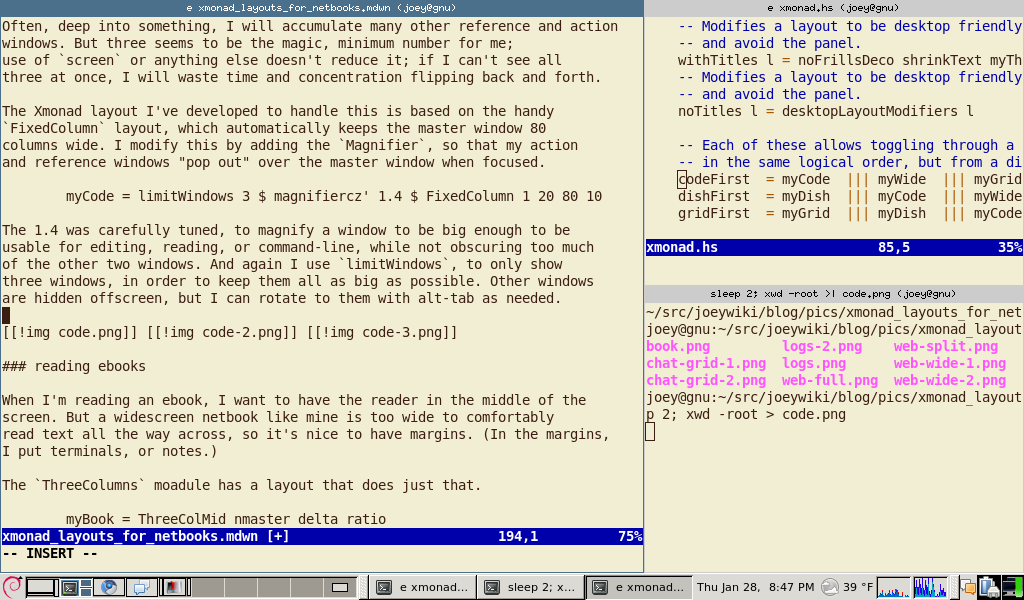
coding
Everything above was easy. Doing coding (or writing) on a small screen is where it gets hard. When I'm coding I want to have one window that is exactly 80 columns wide, and as tall as possible, where I do the main development. Then I need a minimum of two other windows also visible: one action window for running tests and the like, and one to view references (emails, man pages, other files, etc). I may need to view any of these windows fullscreen at any time, of course.
As an example of the three window rule:
While I'm writing this post, I have a reference window open
with my .xmonad/xmonad.hs, and an action window open where I am
managing screenshots.
Often, deep into something, I will accumulate many other reference and action
windows. But three seems to be the magic, minimum number for me;
use of screen or anything else doesn't reduce it; if I can't see all
three at once, I will waste time and concentration flipping back and forth.
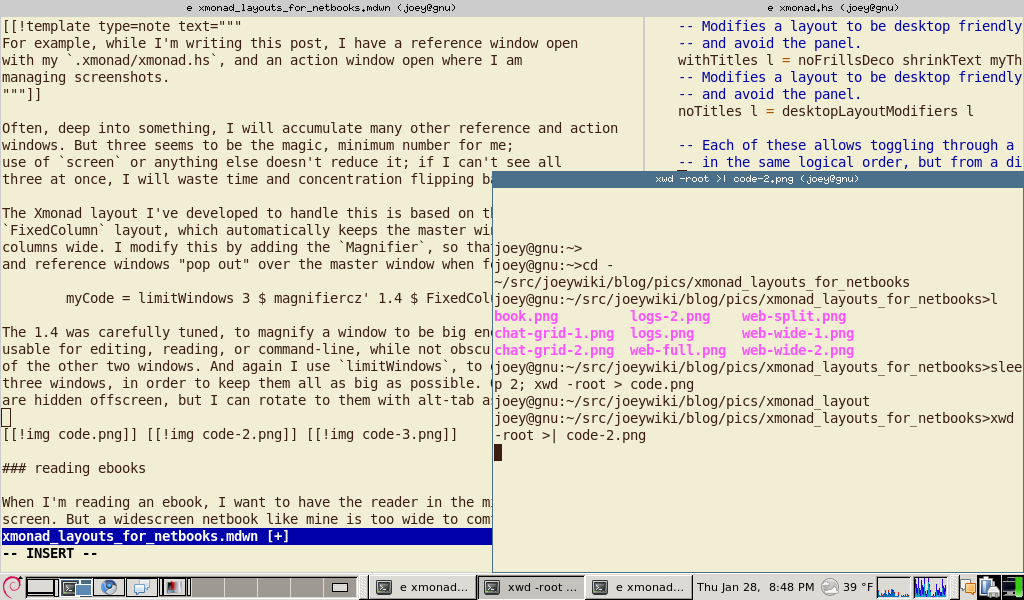
The Xmonad layout I've developed to handle this is based on the handy
FixedColumn layout, which automatically keeps the master window 80
columns wide. I modify this by adding the Magnifier, so that my action
and reference windows "pop out" over the master window when focused.
myCode = limitWindows 3 $ magnifiercz' 1.4 $ FixedColumn 1 20 80 10
The 1.4 was carefully tuned, to magnify a window to be big enough to be
usable for editing, reading, or command-line, while not obscuring too much
of the other two windows. And again I use limitWindows, to only show
three windows, in order to keep them all as big as possible. Other windows
are hidden offscreen, but I can rotate to them with alt-tab as needed.
reading ebooks
When I'm reading an ebook, I want to have the reader in the middle of the screen. But a widescreen netbook like mine is too wide to comfortably read text all the way across, so it's nice to have margins. (In the margins, I put terminals, or notes.)
The ThreeColumns module has a layout that does just that.
myBook = ThreeColMid nmaster delta ratio
    where
        nmaster = 1
        -- Percent of screen to increment by when resizing panes
        delta   = 3/100
        -- Default proportion of screen occupied by master pane
        ratio   = 2/3
putting it all together
I join all my layouts together, so Xmonad will allow switching between them. These three combinations all have the same layouts, only ordered differently, so that different workspaces can have different default layouts.
codeFirst  = myCode  ||| myWide  ||| myGrid  ||| myDish
dishFirst  = myDish  ||| myCode  ||| myWide  ||| myGrid
gridFirst  = myGrid  ||| myDish  ||| myCode  ||| myWide
Xmonad layouts can be decorated with things like title bars. To save horizontal space, I leave off the title bars on layouts where they are not needed to disambiguate windows. Two helper functions can be applied to add or remove titles (and also cause the layout to avoid the Gnome panel.)
withTitles l = noFrillsDeco shrinkText myTheme (desktopLayoutModifiers l)
noTitles l = desktopLayoutModifiers l
I have semi-dedicated workspaces; one for each of the above activities.
To assign a layout to a workspace, I use the PerWorkspace module.
Notice that the "web" workspace has only two available layouts.
Meanwhile, the "book" workspace always uses the specialized myBook
layout; I don't use that layout elsewhere.
perWS = onWorkspace "logs" (withTitles $ myLogs' dishFirst) $
        onWorkspace "web"  (noTitles   $ (mySplit ||| myWide)) $
        onWorkspace "chat" (noTitles   $ myChat' gridFirst) $
        onWorkspace "book" (noTitles   $ myBook) $
                           (withTitles $ codeFirst)
Finally, I allow toggling between the currently selected layout and
fullscreen mode, and use smartBorders to avoid displaying borders when
there is only one window onscreen.
myLayout = smartBorders $ toggleLayouts Full perWS
Xmonad layout optimised for the small screen of a netbook: Done! (For now...)
PS: Thanks to #xmonad regulars for always having the answer
I need up their sleeves.
No toolbar, just a mode line and a status bar. Tabs if you want them. The main dev is an avid XMonad user (I prefer StumpWM, myself). It's in Testing, and there is a daily snapshot archive, as well. If you've ever messed with Emacs, the default keybindings are similar, and, like Emacs, customisable to whatever you choose.
Seriously, get your screen real-estate back. Why be almost-elitist? Free yourself from the tyranny of the mouse and run free with us! Buy a Kinesis! Start using dark GTK/Qt themes! Live in the shell and/or Emacs!
...but in all seriousness, try Conkeror.
Your coding desktop could be replaced by a single Emacs session. While I've fallen away from the tiling WM crew (long story related to living back where door locks don't help much), I have at least one desktop with a full-screen Emacs. That will be split various ways depending on my tasks. Shell, ANSI-term, and ssh+directory tracking work wonders when you deal primarily with remote, funky OS development. Once I have the screen split, it stays the way I want; I've never even set up window registers.
My usage likely is restricted to whatever pattern I've learned, but remote editing and compiling is so ridiculously simple...
When I read that you were using xmonad 6 months to a year ago, I was wondering if I would ever understand how to haskel with it and make it do what I like seeing on my desktop... sidebar: I relate very much to the no locked doors and the sanity of emacs, even though I was not aware it could do that too [...] I added dwm to my list of desktops that I regularly log into, about a year ago, iirc. I have not yet recompiled the source and still use the dwm-xx-debs I get from the debian repos.... I'm not saying dwm is user friendly like gnome or kde, what I am saying is that dwm and uzbl are a tight combination of screen usage... Very much like xmoad seems to be as I look at your examples. I hope to view a termcast very soon too. I've just missed one or two already.
I don't like the idea using terminals as spacers. There are at least two ways doing this explicitly. The first is ResizeScreen (I've stripped irrelevent stuff from my config, so the below may or may not compile):
The second way is XMonad.Layout.Gaps, which didn't work nicely with my dual-head setup, but nonetheless:
Also, for maximizing web browser screen real estate I recommend vimperator.
I use Xmonad on an EeePC and love it too. But just one tip for reading ebooks: you can actually flip your netbook around and use it like a book!
I get acroread running, flip the document 90CCW, and then turn my laptop on its side (so the screen is on the right). If you then put it into fullscreen mode, you've got a perfect ebook reader. For bonus points, you can set it so that a left mouse click pages forward and right mouseclick pages backward (when the laptop is turned over, this is top mouse and bottom mouse respectively). Then it kind of feels like a Kindle..
I've been hunting around for an answer to this for about a year, on and off every few months. It looks like you might know where to go looking.
I've been attempting to use xmonad with google-chrome as a web browser. When I do a tab re-arrangement in chrome while running xmonad, the tab tears off and will never merge back to the window it came from, and a new window is created. There seems to be no way to get the tab to merge back onto the original or any other window.
I've found few and poor references to this behavior:
The google search for 'chrome tab drag xmonad' and variants are sparse pickings.
Most aggravating, for about 5 minutes this morning, running the default xmonad configuration, this was working as I expected it to. One window manager restart later, keeping the default configuration, it wasn't. I can't reproduce the conditions of functionality.
Any ideas? Can you point me in the right direction?
Thanks.
Thank you.
That comment, and your working configuration was actually enough to let me figure out what was going on.